
Need an easy and delicious dessert? This Chocolate truffle recipe with a step-by-step guide delivers a luxurious treat that feels like a special indulgence. Yet it’s surprisingly easy to make at home.

Whether preparing for a celebration, giving them as a gift, or simply treating yourself for this year’s Valentine’s Day, these homemade chocolate truffles will surely impress. This guide will walk you through a simple and delicious recipe, share some tips, and troubleshoot any common issues. You only need a few ingredients and refrigeration hours to make these chocolate truffles at home.
Ingredients for Easy Homemade Chocolate Truffles Recipe

- High-quality dark or milk chocolate (choose one you enjoy eating, as it will make up most of your truffle’s flavor). You can also use both chocolates.
- Heavy cream
- Unsalted butter- optional, but add creaminess to the recipe
- Vanilla extract (optional, but adds a lovely depth of flavor)
- Cocoa powder, chopped nuts, or melted chocolate for coating (you can customize your truffles with a variety of coatings)
Tools:
- Heatproof bowl
- Saucepan
- Whisk or spatula
- Spoon or melon baller (for shaping the truffles)
- Baking sheet or tray
- Parchment paper
- Silicone Mold
Step-by-Step Instructions for Making Chocolate Truffles
1. Chop the Chocolate
Start by chopping the chocolate into small, even pieces. This will help it melt more quickly and uniformly with the hot cream. Use a sharp knife and be careful with your fingers! I use chocolate chips in this specific recipe, which do not require chopping.
2. Heat the Cream
Heat the heavy cream in a saucepan over medium heat until it just begins to simmer; don’t let it come to a full boil. Once it’s hot, remove it from the heat immediately. The cream can also be heated in the microwave.
3. Combine Chocolate and Cream


Pour the hot cream over the chopped chocolate in a heatproof bowl. Let it sit for 1-2 minutes to allow the heat from the cream to start melting the chocolate. After waiting, stir gently with a whisk or spatula until the mixture is smooth and well combined.
4. Add Flavoring (Optional)
If you’d like to add a little extra flavor, this is the moment to add 1 teaspoon of vanilla extract, a pinch of sea salt, or even a splash of liqueur (like Baileys or Grand Marnier). Stir these additions into the chocolate mixture.
5. Pour Ganache into Mold
If using, pour your ganache mixture into the mold and place it in the refrigerator for about 2 hours for the ganache to firm up. The hours will depend on the mold’s depth and the fridge’s temperature. If you don’t have mold, then continue to step 6

6. Cool Ganache
Now that you have your smooth chocolate ganache cover the bowl with plastic wrap and refrigerate it for 1-2 hours. The ganache should firm up and become scoopable.
7. Form the Truffles
Once the ganache is firm, use a spoon or melon baller to scoop out small portions of the mixture. Roll them between your hands to form balls. Be aware that the chocolate may melt a bit from the heat of your hands, but this is normal. If it gets too sticky, refrigerate the ganache again for 10-15 minutes.
8. Coat the Truffles


Once shaped, you can roll the truffles in a variety of coatings. Some popular options include:
- Cocoa powder (for a classic look and taste)
- Finely chopped nuts (hazelnuts, almonds, or pistachios add great texture)
- Shredded coconut
- Freeze dried strawberry powder
- Melted chocolate (for a glossy finish)
- Sprinkles or edible gold leaf for a fun, festive touch!
9. Refrigerate to Set
Place the coated truffles on a tray lined with parchment paper. Refrigerate them for at least 30 minutes to set fully. Enjoy them straight from the fridge or let them sit at room temperature for a few minutes before serving for a soft, melt-in-your-mouth experience.

Common Issues and Troubleshooting:
1. Chocolate Ganache Is Too Runny
If your ganache mixture is too runny to form into truffles, the cream is too hot, or the chocolate isn’t chopped finely enough. To fix this:
- Place the bowl in the refrigerator for 15-30 minutes until it firms up.
- If the ganache is still too runny, try melting more chocolate and slowly adding it to it to thicken it.
2. Truffles Are Too Sticky to Roll
Sometimes, truffles can become too sticky to handle, especially on warm days or if the ganache was handled for too long before cooling. This can be avoided by:
- Refrigerate the ganache for 10-15 minutes if it becomes too soft while rolling.
- Lightly dusting your hands with cocoa powder or powdered sugar can help prevent the ganache from sticking.
3. Coatings Won’t Stick to the Truffles
If your truffles aren’t properly coated in your chosen toppings, it’s likely because the surface of the ganache is too smooth or firm. To troubleshoot:
- Gently roll the truffle in some cocoa powder or powdered sugar before applying other coatings to help them stick.
- Alternatively, lightly warm the coating (such as melted chocolate or nuts) so they stick more easily.
4. The Truffles Are Too Soft or Melted After a Few Hours
This can happen if the cream-to-chocolate ratio isn’t quite right or the truffles are stored too warm. Keep your truffles refrigerated and in an airtight container to prevent them from becoming too soft.
- If you’re making them for a special occasion, consider keeping them in a cool place until it’s time to serve. You can also opt for a firmer ganache by adjusting the cream ratio (slightly reducing the cream).
5. Truffles Look Cracked or Dull
Truffles that are cracked or look dull may have been chilled too quickly or at too low of a temperature. Allow them to come to room temperature for a few minutes before serving to restore a glossy finish and smooth texture.

Tips for Success:
- Use High-Quality Chocolate: The better the chocolate, the better the truffles taste. Aim for at least 60% cocoa content for a rich flavor.
- Experiment with Flavors: Add different extracts (like orange, almond, or peppermint), or mix in chopped dried fruit or a sprinkle of sea salt for unique flavors.
- Make It Fun: Get creative with your coatings. For a glossy finish, dip the truffles in melted white, milk, or dark chocolate, or roll them in crushed candy canes during the holidays.
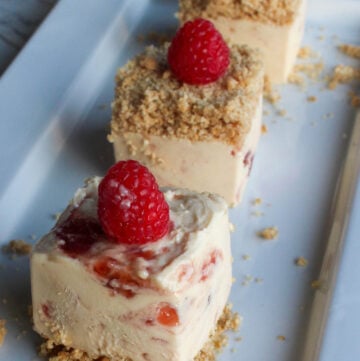
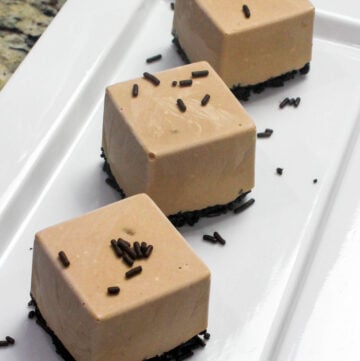
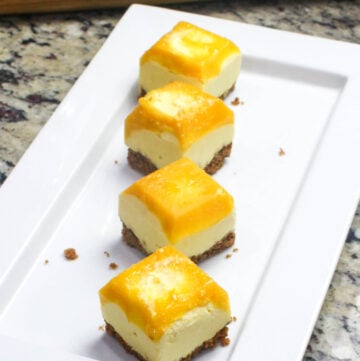
More similar recipes you’ll like
Don’t Want to Miss a Thing?
Follow me on Pinterest, Facebook, YouTube, and Instagram to keep up with the latest news from Duchez Kitchen.
If you have any questions about this recipe, I would love to hear them in the comment section below. Did you make this recipe? Let me know by leaving a review and recipe rating below. Tag me @ #theduchezkitchen- on Instagram, YouTube, and Facebook.
Thanks for reading. As always, know that God loves you, and stay blessed!
Happy Mixing!
Linda!!

Easy Homemade Chocolate Truffle Recipe
Equipment
- Heatproof bowl
- Saucepan
- Whisk or spatula
- Spoon or melon baller (for shaping the truffles)
- Baking Sheet or tray
- Parchment Paper
- Silicone Mold( for molding or shaping the truffles)
Ingredients
- 8 oz High-quality dark or milk chocolate choose one you enjoy eating, as it will make up most of your truffle’s flavor. You can also use both chocolates.
- ½ cup Heavy cream
- 1 tablespoon unsalted butter- optional but add creaminess to the recipe
- 1 teaspoon Vanilla extract optional, but adds a lovely depth of flavor
- Cocoa powder chopped nuts, or melted chocolate for coating (you can customize your truffles with a variety of coatings)
Instructions
- Chop the Chocolate
- Start by chopping the chocolate into small, even pieces. This will help it melt more quickly and uniformly with the hot cream. Use a sharp knife, and be careful with your fingers! I use chocolate chips in this specific recipe, which do not require chopping.
- Heat the Cream
- Heat the heavy cream in a saucepan over medium heat until it just begins to simmer; don’t let it come to a full boil. Once it’s hot, remove it from the heat immediately. The cream can also be heated in the microwave.
- Combine Chocolate and Cream
- Pour the hot cream over the chopped chocolate in a heatproof bowl. Let it sit for 1-2 minutes to allow the heat from the cream to start melting the chocolate. After waiting, stir gently with a whisk or spatula until the mixture is smooth and well combined.
- Add Flavoring (Optional)
- If you’d like to add a little extra flavor, this is the moment to add 1 teaspoon of vanilla extract, a pinch of sea salt, or even a splash of liqueur (like Baileys or Grand Marnier). Stir these additions into the chocolate mixture.
- Pour Ganache into Mold
- If using, pour your ganache mixture into the mold and place it in the refrigerator for about 2 hours for the ganache to firm up. The hours will depend on the mold’s depth and the fridge’s temperature. If you don’t have mold, then continue to step 6
- Cool Ganache
- Now that you have your smooth chocolate ganache cover the bowl with plastic wrap and refrigerate it for 1-2 hours. The ganache should firm up and become scoopable.
- Form the Truffles
- Once the ganache is firm, use a spoon or melon baller to scoop out small portions of the mixture. Roll them between your hands to form balls. Be aware that the chocolate may melt a bit from the heat of your hands, but this is normal. If it gets too sticky, refrigerate the ganache again for 10-15 minutes. Serve and enjoy!


Leave a Reply