
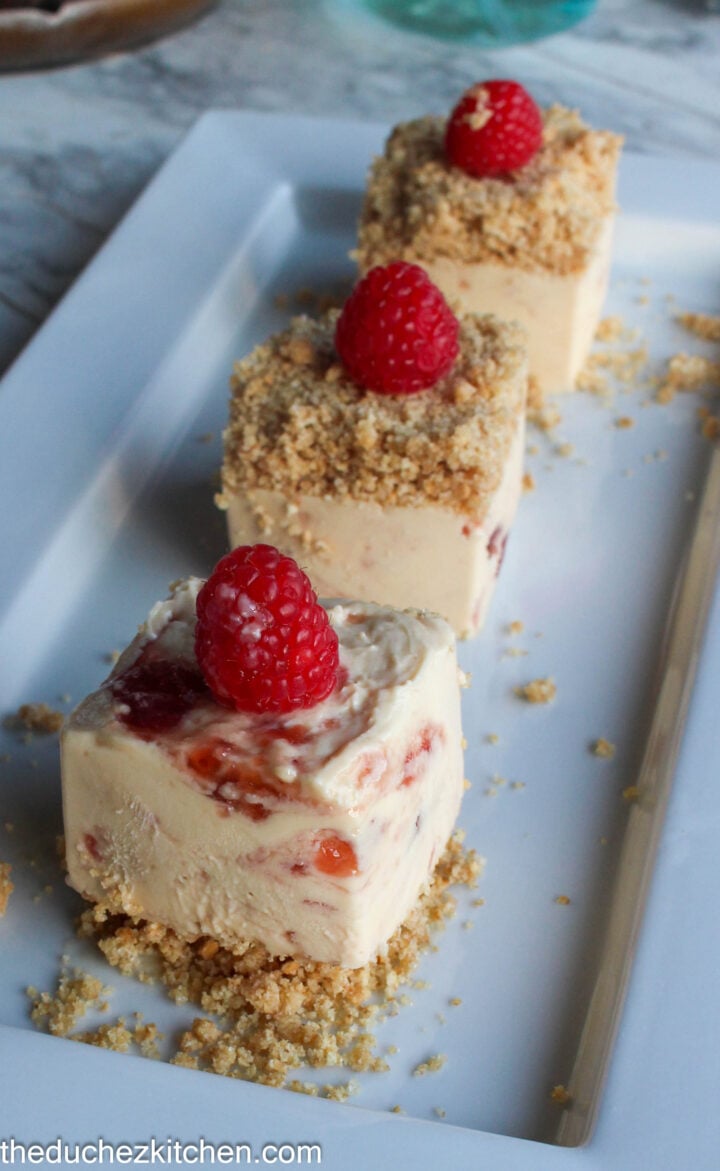
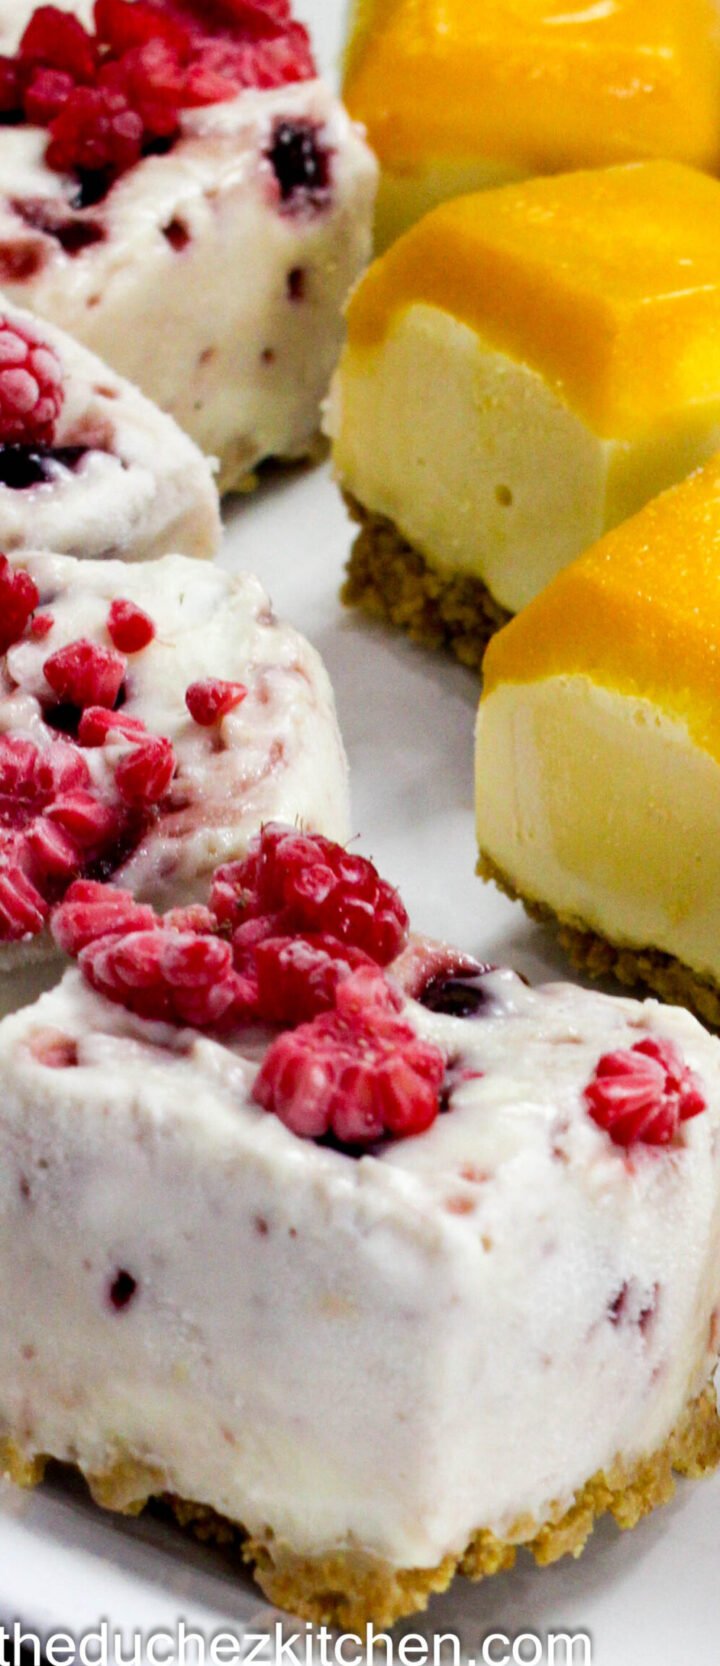
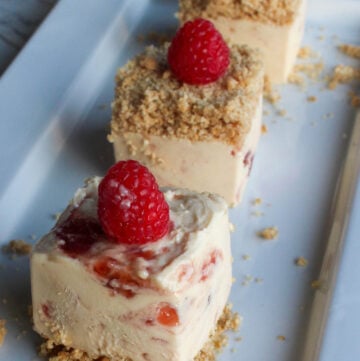
Indulge in these no-bake raspberry cheesecake bites! Creamy, tangy, and oh-so-sweet, they’re a treat everyone will love. Best of all, they’re completely gelatin-free and require no oven, just pure dessert joy in every bite.
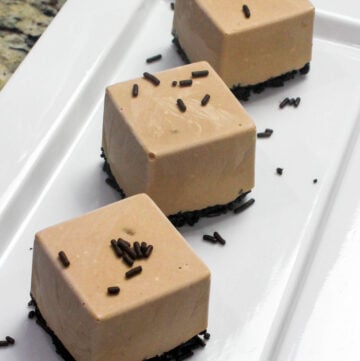
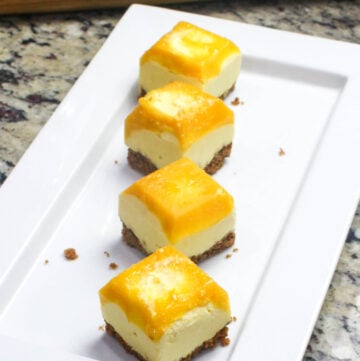
This no-bake cheesecake is made with just a few ingredients, and the recipe can be customized to suit your taste. If you want more no-bake options, try this no-bake mango cheesecake or this no-bake mocha cheesecake. Whether you’re an experienced home baker or a beginner, this recipe delivers maximum flavor with minimal effort. Additionally, these cheesecakes are freezer-friendly!
Why You’ll Love This Recipe
- No baking required
- Raspberry flavor in every bite
- Perfect for portion control and entertaining
- Kid-friendly and freezer-friendly
- Customizable – Swap berries, add zest, or drizzle with chocolate.
This is a very simple recipe to prepare. The only thing you’ll need to consider is the waiting time for it to freeze, and this is the best ice tray ( favorite one) that works. I used store-bought raspberry jam, but since raspberries are currently in season, you can make your own homemade raspberry sauce or jam to use in this recipe.
Ingredients
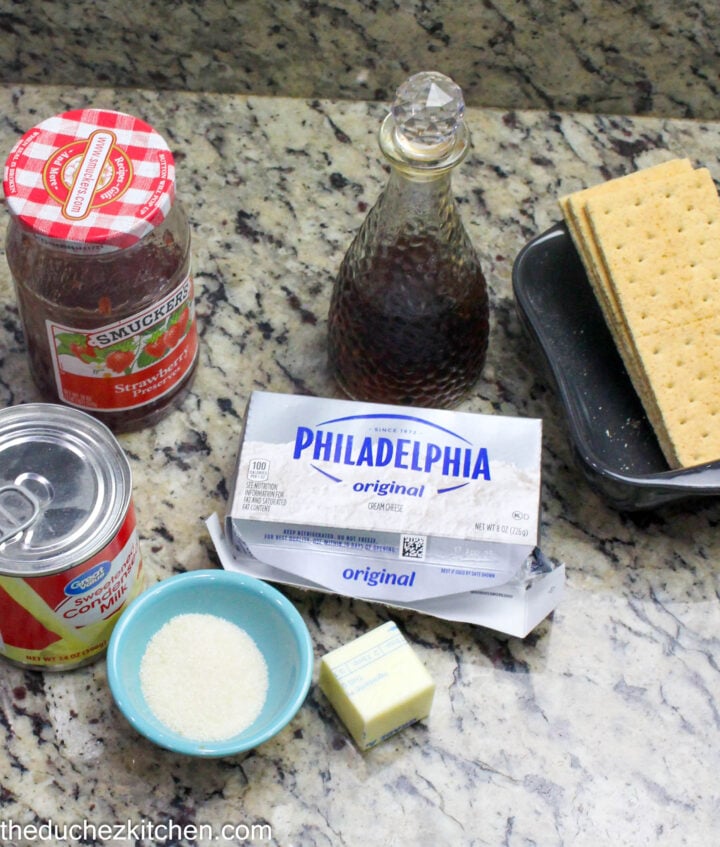
For the Crust:
- Graham crackers- finely crushed
- Unsalted butter- melted
- Sugar
For the Raspberry Cheesecake Filling:
- Cream cheese, softened
- Sweetened condensed milk
- Raspberry jam
- Vanilla extract
- Sugar
Instructions for Making No-Bake Raspberry Cheesecake Bites
- Make the Filling
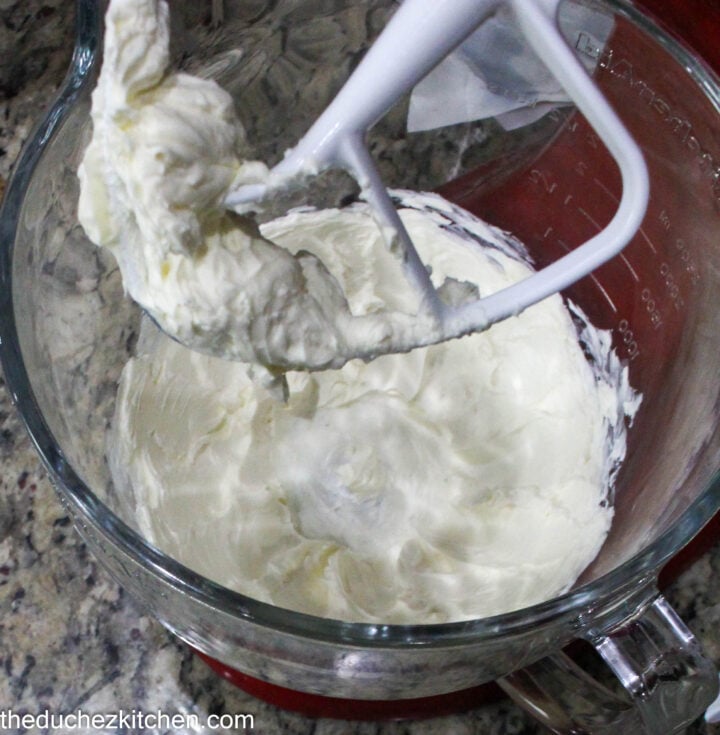
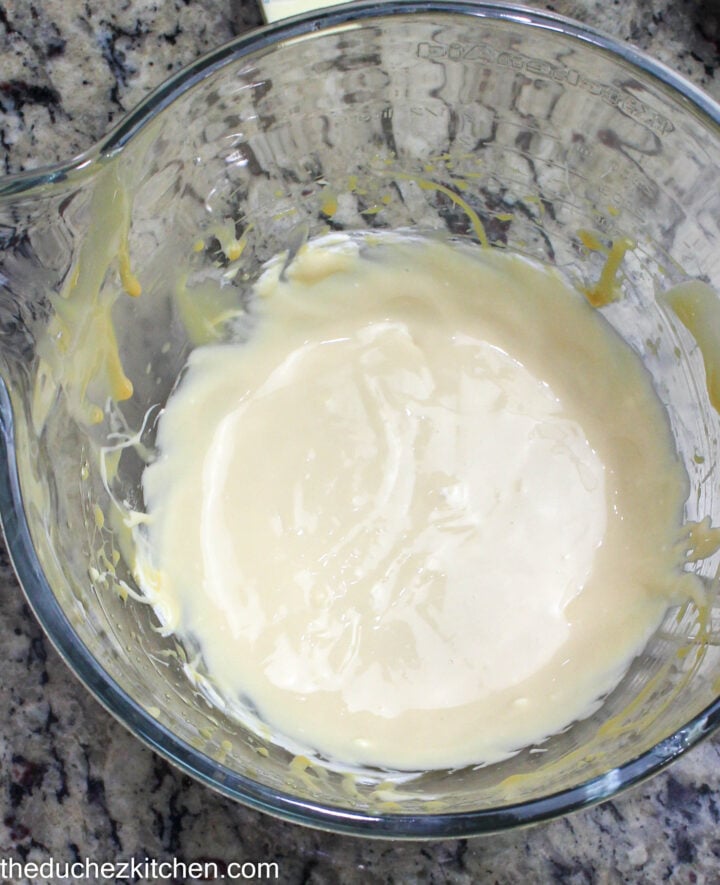
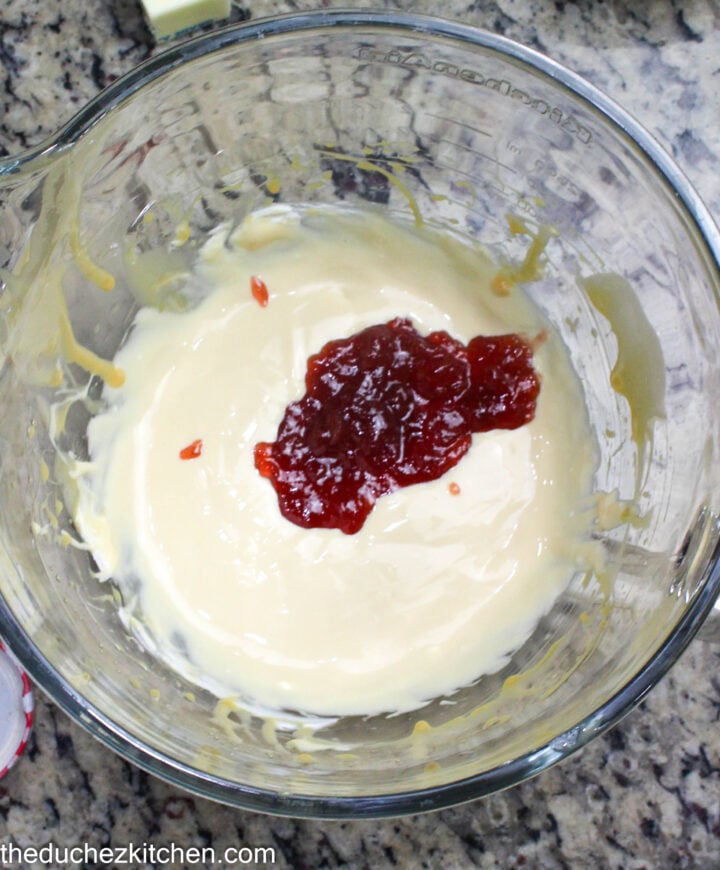
In the bowl of a stand mixer fitted with the paddle attachment, add the cream cheese and beat until smooth. Then, incorporate the condensed milk and vanilla extract into the cream cheese mixture, mixing until well combined.
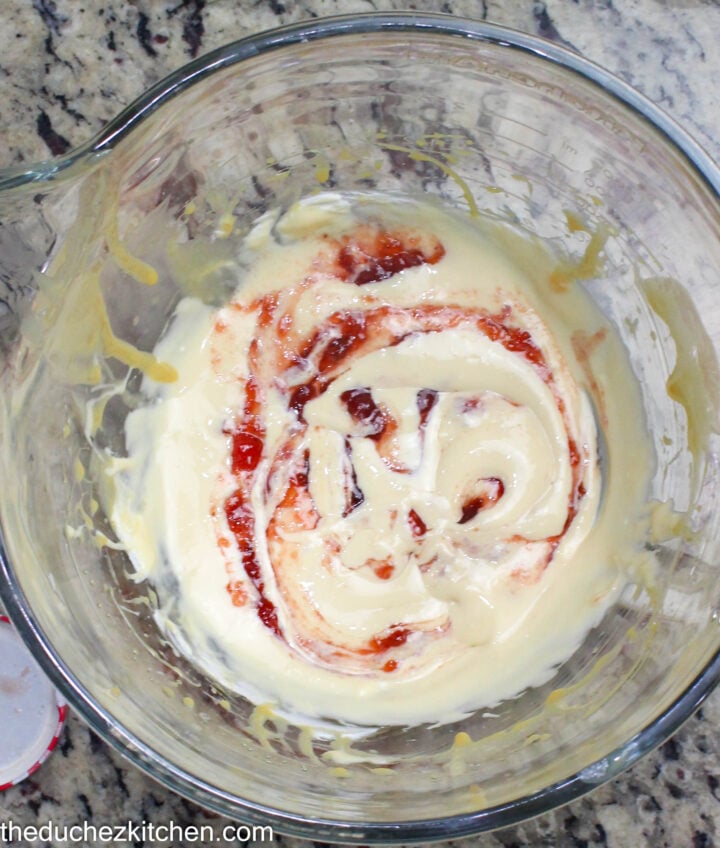
Next, add the raspberry jam on top of the cheesecake filling. Use a spatula to gently swirl it in a few times—be careful not to overmix, as you want to maintain a swirl pattern.
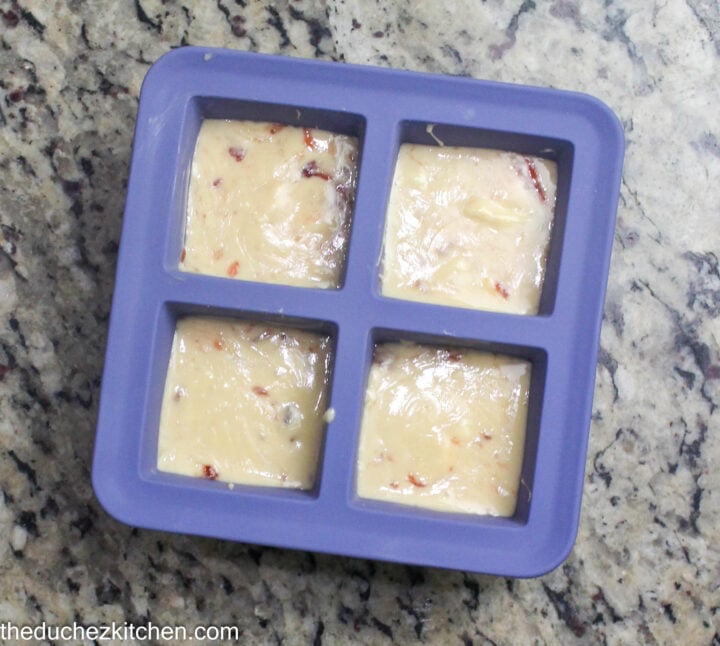
Spoon the cream cheese mixture into an ice tray mold, leaving about ¼ inch of space at the top. Once filled, transfer the mold to the freezer.

- Prepare the Crust
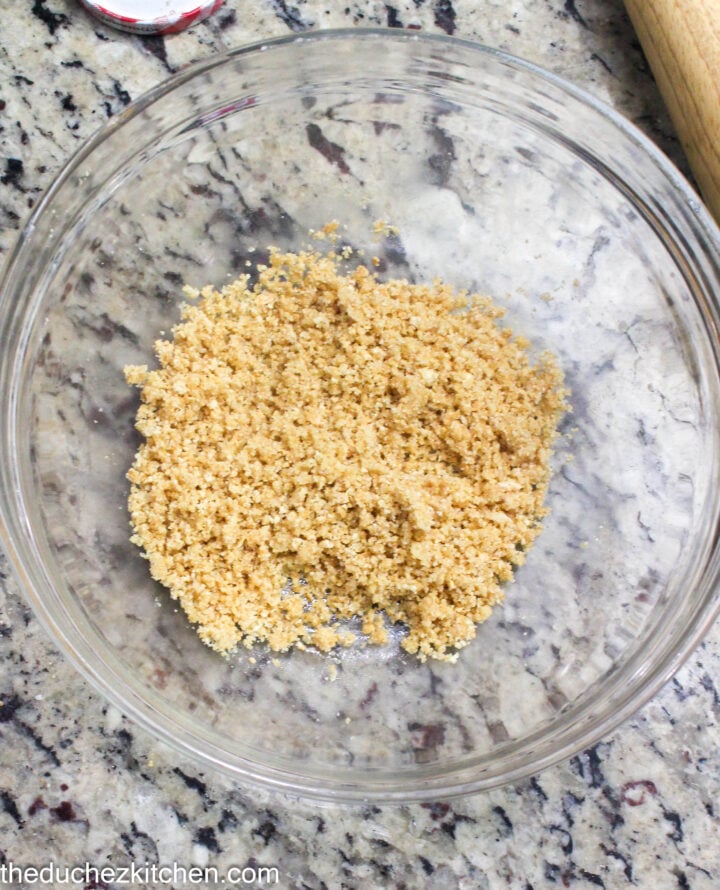
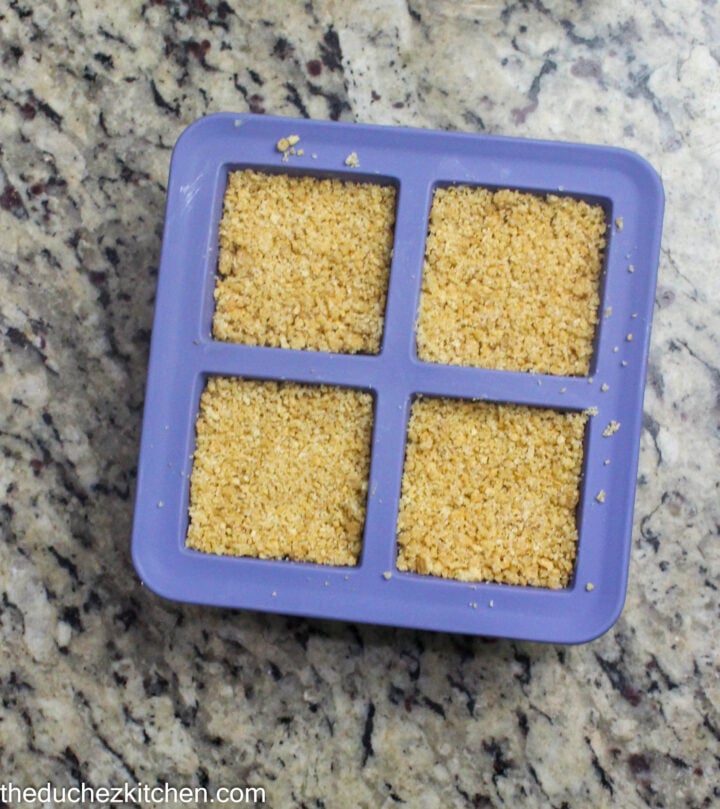
In a small bowl, combine the graham cracker crumbs, sugar, and melted butter. Stir the mixture until it resembles wet sand and is well blended. If the crumbs seem dry, add a few drops of melted butter to help the crust set properly. Remove the ice tray from the freezer and spoon the crust onto the cheesecake, pressing it firmly with the back of a spoon to ensure that the surface is evenly covered.
- Freezing
Transfer the tray into the freezer and chill for about 5 hours or overnight
4. Serve
- Pop bites out of the tray and let sit at room temp for 5–10 minutes before serving.
- Store extras in an airtight container in the freezer for up to 2 weeks.
Styling & Serving Ideas
- Top with raspberry coulis or lemon zest for a pop of color.
- Serve in mini cupcake liners for easy handling.
FAQs
Can I freeze them?
Absolutely! Freeze for up to 2 months. Thaw in the fridge before serving.
Can I make this dairy-free?
Use dairy-free cream cheese and coconut whipped topping for a vegan version.
Can I use any fruit Jam?
Yes! That is what makes this recipe versatile. You can customize it to your taste and just use any fruit in season

Variations on this Raspberry Cheesecake:
- Substitute the graham cracker crumbs with a different type of cookie—lemon cookies, vanilla wafers, and gingersnaps all work well in this recipe!
- Experiment with different varieties of berries! Blueberries, blackberries, and sliced strawberries can be great alternatives. Adjust the amount of sugar based on the natural sweetness of the berries; super-sweet berries will need less sugar, while tart berries may require more.
- For a delicious chocolate raspberry twist, add a tablespoon of unsweetened cocoa powder to the cheesecake batter.
- You can also enhance the flavor by adding a teaspoon of vanilla extract.
Other Summer Recipes
No-bake mocha cheesecake bites
These No-Bake Raspberry Cheesecake Bites are proof that dessert doesn’t need to be complicated to be delicious. With just a handful of ingredients and zero oven time, you’ll have a crowd-pleasing treat that’s as beautiful as it is tasty.
DON’T YOU Want to Miss a Thing?
Follow me on Pinterest, Facebook, YouTube, and Instagram to keep up with the latest news from Duchez Kitchen.
If you have any questions about this recipe, I would love to hear them in the comments section below. Did you make this recipe? Please let me know by leaving a review and rating your recipe below. Tag me @ #theduchezkitchen on Instagram, YouTube, and Facebook.
Thanks for reading and stay blessed!
Happy Cooking!
No-bake Raspberry Cheesecake Bites
Equipment
Ingredients
- FOR THE CRUST:
- 3 sheets Graham crackers- finely crushed – ½ cup crumbs
- 2 tablespoons unsalted butter- melted
- 1 tablespoon Sugar
- FOR THE RASPBERRY CHEESECAKE FILLING:
- 8 ounces Cream cheese softened
- ½ can / 7 ounces Sweetened condensed milk
- ¼ cup Raspberry jam
- ½ teaspoon Vanilla extract
Instructions
- INSTRUCTIONS FOR MAKING NO-BAKE RASPBERRY CHEESECAKE BITES
- Making the Filling
- In the bowl of a stand mixer fitted with the paddle attachment, add the cream cheese and beat until smooth. Then, incorporate the condensed milk and vanilla extract into the cream cheese mixture, mixing until well combined.
- Next, add the raspberry jam on top of the cheesecake filling. Use a spatula to gently swirl it in a few times—be careful not to overmix, as you want to maintain a swirl pattern.
- Spoon the cream cheese mixture into an ice tray mold, leaving about ¼ inch of space at the top. Once filled, transfer the mold to the freezer.
- Prepare the Crust
- In a small bowl, combine the graham cracker crumbs, sugar, and melted butter. Stir the mixture until it resembles wet sand and is well blended. If the crumbs seem dry, add a few drops of melted butter to help the crust set properly. Remove the ice tray from the freezer and spoon the crust onto the cheesecake, pressing it firmly with the back of a spoon to ensure that the surface is evenly covered.
- Freezing
- Transfer the tray into the freezer and chill for about 5 hours or overnight
- Serve
- Pop bites out of the tray and let sit at room temp for 5–10 minutes before serving.
- Store extras in an airtight container in the freezer for up to 2 weeks.
- Styling & Serving Ideas
- Top with raspberry coulis or lemon zest for a pop of color.
- Serve in mini cupcake liners for easy handling.


Leave a Reply